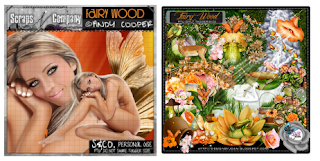
PTU-Kit-"FAIRY WOOD"-Designs By Joan-HERE
All available at Scraps and Company!
Tutorial
This tutorial was written by me and any similarities to any other is just a
coincidence. This tut was written in PSP 9 but should work in all versions.
This tut assumes you have a moderate working knowledge of PSP.
What you will need
Tube of choice.
Kit of choice.
coincidence. This tut was written in PSP 9 but should work in all versions.
This tut assumes you have a moderate working knowledge of PSP.
What you will need
Tube of choice.
Kit of choice.
Font of choice-I used"Brayden Script"
Mask of Choice-I used" KKMASK1"-HERE
No outside filters used
Open a 800 x 800 canvas.Flood fill with white-rename bk
Copy and paste elements as follows, I have put the % of resize and any
special instructions.
16-no resize
35-no resize
30-35
8-25-mirror
129-55-mirror
Co[py and paste tube-resize 55- Blend erase into flower.
66-75
31-35
79-55
70-35
56-35
36-35
12-45
1-40
82-40
6-40-mirror
Add Drop shadows as needed
Close bk layer -merge visible
Resize- sharpen
New raster above bk selctions all-
copy and paste paper1 into selection-
deselect.-Apply mask-Merge group
Delete bk layer -merge visible .
Add ©- lic # and name
Save as PNG.


No comments:
Post a Comment