Pages

Showing posts with label Dnscraps. Show all posts

Monday, July 27, 2015

WONDERLAND MAD QUEEN

****WONDERLAND MAD QUEEN****
  PTU CT Tut for S&CO
PTU-Tube-"WONDERLAND MAD QUEEN"© PandoraCreations-HERE
PTU-Kit-"Wonderland Mad Queen"-Dnscraps-HERE
All available at Scraps and Company!
 Tutorial
  This tutorial was written by me and any similarities to any other is just a
coincidence. This tut was written in PSP 9 but should work in all versions.
 This tut assumes you have a moderate working knowledge of PSP.
What you will need
 Tube of choice.
Kit of choice.
Mask of choice-I used"WSL_Mask38"-HERE
Font of choice-I used "Cocktail Bubbly"
No outside filters used. 


    Let’s get started!
Open a 700 x 700 canvas.Flood fill with white-rename bk
 Copy and paste elements as follows, I have put the % of resize and any
special instructions.
 
water-80
 
tree-60
 
cards 2-40-duplicate and mirror
 
dark tree-60
 
mushrooms-35
 
elves-35
 
magicdoor-80
 
Copy and paste tube -resize 20%
 
worm-15
 
magicss-25
 
bottle 2-20
 
cat 2-25
 
bunny-20
 
clock-15


Add Drop shadows as needed
 
Close bk layer -merge visible
 
Resize- sharpen
 
New raster above bk selections all-
copy and paste paper 2 into selection -deselect.
 
Apply mask to paper layer-merge group.
 
Delete white bk
 
Merge visible 
 
Add ©- lic # and name

Save as PNG.
 
Would love to see your variations of this tut
Please mail tags to laurag315@gmail.com
please let me know which tut you did and put Laura
in the subject line and I will place your tag on my blog.
 
 
Tube and Kit Preview
 

Thursday, July 16, 2015

BLONDE AND PINK

****BLONDE AND PINK****
  PTU CT Tut for S&CO
PTU-Tube-"BLONDE AND PINK MIX"© Danny Lee-HERE 
PTU-Kit-"Blonde and Pink mix"-Dnscraps-HERE
All available at Scraps and Company!
 Tutorial
  This tutorial was written by me and any similarities to any other is just a
coincidence. This tut was written in PSP 9 but should work in all versions.
 This tut assumes you have a moderate working knowledge of PSP.
What you will need
 Tube of choice.
Kit of choice.
Mask of choice-
RD_MaskSet70_Mask2  HERE
Font of choice-I used "Darleston"
No outside filters used. 


    Let’s get started!
Open a 700 x 700 canvas.Flood fill with white-rename bk
 Copy and paste elements as follows, I have put the % of resize and any
special instructions.
 
plants-75wheel-45
 
prettyflowers2-70-Duplicate and mirror
 
tree-45
 
trunk2-65
 
lawn-35
 
Copy and paste tube-resize 45%
 
fence-40
 
flowerss-45
 
glass-25
 
leaves-50-Duplicate and mirror
 
birds-60
 
bird2-25
 
 
Add Drop shadows as needed
 
Close bk layer -merge visible
 
Resize- sharpen
 
New raster above bk selections all-
copy and paste paper 3 into selection -deselect.
 
Apply mask to paper layer-merge group.
Duplicate the mask layer.
 
Delete white bk
 
Merge visible 
 
Add ©- lic # and name

Save as PNG.
 
Would love to see your variations of this tut
Please mail tags to laurag315@gmail.com
please let me know which tut you did and put Laura
in the subject line and I will place your tag on my blog.
 
 
Tube and Kit Preview


Thursday, June 4, 2015

FAIRY DRAGON 3

****FAIRY DRAGON 3****
  PTU CT Tut for S&CO
PTU-Tube-" FAIRY DRAGON 3"©SNC-Exclu-Angelica S-HERE
PTU-Kit-"Spells Dragon"- Dnscraps-HERE
All available at Scraps and Company!
 
 
Tutorial

  This tutorial was written by me and any similarities to any other is just a
coincidence. This tut was written in PSP 9 but should work in all versions.
 This tut assumes you have a moderate working knowledge of PSP.
What you will need
 Tube of choice.
Kit of choice.
Mask of choice-I used "BD Mask Set 8-80"-HERE
Font of choice-I used"Trinigan FG"
No outside filters used.


    Let’s get started!
Open a 800 x 800 canvas.Flood fill with white-rename bk
 Copy and paste elements as follows, I have put the % of resize and any
special instructions.
 
 Wireframe-75
 
activate bk layer copy and paste paper 3-resize 62%
move inside the wire frame.
 
Activate wireframe layer
Copy and paste keys-resize-25%

ladder-45

stones-60

dragon 2-35

Copy and paste tube -resize 35%
set her on stones,

chest-35
 
books-25

dragon-35

moon 2-25

 Add drop shadows where you like.
Close bk layer-merge visible
 
Copy and paste paper 6 -move under frame-
erase the paper outside of the frame.
merge visible.
 
Open bk layer- Copy and paste paper 8 as new layer
Apply mask-Merge group
 
Copy and paste  paper 7 as new layer
Apply mask-Merge group-Mirror.

Delete bk layer
 
Merge visible- Resize-Sharpen
 
Add ©- lic # and name

Save as PNG.
 
Would love to see your variations of this tut
Please mail tags to laurag315@gmail.com
please let me know which tut you did and put Laura
in the subject line and I will place your tag on my blog.
 
 
Tube and Kit Preview


Monday, May 25, 2015

FAIRY JOJO

****FAIRY JOJO****
  PTU CT Tut for S&CO
PTU-Tube-"FAIRY JOJO" ©Ishika Chowdhury-HERE
PTU-Kit-"Fairy Jojo -Mushroom"- Dnscraps-HERE
All available at Scraps and Company!
Tutorial

  This tutorial was written by me and any similarities to any other is just a
coincidence. This tut was written in PSP 9 but should work in all versions.
 This tut assumes you have a moderate working knowledge of PSP.
What you will need
 Tube of choice.
Kit of choice.
Font of choice-I used"Fontdinerdotcom Sparkly"
Mask of Choice-I used"DD_NGM1_2015_1"-HERE
No outside filters used


    Let’s get started!
Open a 800 x 800 canvas.Flood fill with white-rename bk
 Copy and paste elements as follows, I have put the % of resize and any
special instructions.
 
 Lawn-60-duplicate and mirror
house-60
road-60
plantss-60
flowerss3-25
Tube-20
mushroom-15
mushrooms-35
plantss-35
tree-80
mushroom-12
trunk-65
magicleaves-20
bird-10
flowers2-25
flowerss4-15
butterfly-15

Add Drop shadows as needed
Close bk layer -merge visible
Resize- sharpen
New raster above bk selctions all-
copy and paste paper7 into selection-
deselect.-Apply mask-Merge group
Delete bk layer -merge visible .
Add ©- lic # and name
Save as PNG.
Would love to see your variations of this tut
Please mail tags to laurag315@gmail.com
please let me know which tut you did and put Laura
in the subject line and I will place your tag on my blog.
 
 
Tube and Kit Preview


Monday, May 18, 2015

Grace

****Grace****
  PTU CT Tut for S&CO
PTU-"Grace" ©Carpe Diem-HERE
PTU-Kit-"Dark Fairy"- Dnscraps-HERE
All available at Scraps and Company!
Tutorial

  This tutorial was written by me and any similarities to any other is just a
coincidence. This tut was written in PSP 9 but should work in all versions.
 This tut assumes you have a moderate working knowledge of PSP.
What you will need
 Tube of choice.
Kit of choice.
Wordart of choice-I used one from -HERE
Font of choice-I used"Scriptina"
No outside filters used


    Let’s get started!
Open a 800 x 800 canvas.Flood fill with white-rename bk
 Copy and paste elements as follows, I have put the % of resize and any
special instructions.
 
fucsia-no resize-duplicate and mirror
wings2-45-duplicate and mirror
magicdoor-no resize-ersae a bit of the bottom
mushroom-50-duplicate and mirror
tube-25-mirror-opacity 60%-Blend mode-Hard Light
Black Tree-65-blend erase a little over the door
Magicslide-50
butterflys-no resize
Copy and paste tube-45%

Add dropshadows where you like.
Close off bk layer -merge visible the rest.
 Open bk layer
starss3-no resize
starspurple-no resize-duplicate and mirror
Add wordart if you like
Delete bk layer
Merge visible the rest.

Resize- sharpen  Add ©- lic # and name
Save as PNG.
 
Would love to see your variations of this tut
Please mail tags to laurag315@gmail.com
please let me know which tut you did and put Laura
in the subject line and I will place your tag on my blog.
 
 
Tube and Kit Preview


Saturday, May 9, 2015

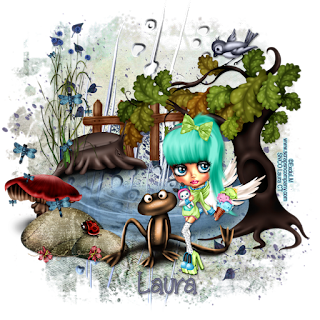
ICE CREAM BABY 1

****ICE CREAM BABY 1****
  PTU CT Tut for S&CO
PTU-"ICE CREAM BABY 1"©ExcluLM-HERE
PTU-Kit-"Ladybug"-Dnscraps-HERE
All available at Scraps and Company!
Tutorial

  This tutorial was written by me and any similarities to any other is just a
coincidence. This tut was written in PSP 9 but should work in all versions.
 This tut assumes you have a moderate working knowledge of PSP.
What you will need
 Tube of choice.
Kit of choice.
Font of choice
Mask of choice
No outside filters used


    Let’s get started!
Open a 800 x 800 canvas.Flood fill with white-rename bk
 Copy and paste elements as follows, I have put the % of resize and any
special instructions.
doodles-no resize
bubbles-no resize
water-80
fence 2-50
tree 2-65
trunks-2-35
flowerss-45
mushroom-25
stones-40
ribbonflowers-25
frog-45
Copy and paste tube-resize 50%
ladybug 2-10
dragonfly-55
bird-15

Add dropshadows where you like.
Close off bk layer -merge visible the rest
New raster above the bk layer
 Copy and paste Paper7  into selection-deselect
Apply mask -I used"1214" by Rebel Designs-HERE
merge group.
New raster above mask layer-selections all
copy and paste" paper"  into selection-deselect
Delete the bk layer
Merge visible.
 Resize- sharpen  Add ©- lic # and name
Save as PNG.
 
Would love to see your variations of this tut
Please mail tags to laurag315@gmail.com
please let me know which tut you did and put Laura
in the subject line and I will place your tag on my blog.
 
 
Tube and Kit Preview
 

Tuesday, April 21, 2015

ANGELIC UNICORN DREAMS

****ANGELIC UNICORN DREAMS****
  PTU CT Tut for S&CO
PTU-Tube -"ANGEL CUTIE 2 DOLL"©SNC-Exclu-HERE
PTU-Kit-"Unicorn Dreams" -Dnscraps-HERE
All available at Scraps and Company!

Tutorial
  This tutorial was written by me and any similarities to any other is just a
coincidence. This tut was written in PSP 9 but should work in all versions.
 This tut assumes you have a moderate working knowledge of PSP.
What you will need
 Tube of choice.
Kit of choice.
Mask of choice
Font of choice
Filter-Xenofex2-Burnt Edges


    Let’s get started!
Open a 700 x 700 canvas.Flood fill with white-rename bk
 Copy and paste elements as follows, I have put the % of resize and any
special instructions.
cloud-50
castle-50
magicwand2-50
unicorn-30
hammoc-15- blend into grass
tube-50
fairyhouse-25
butterfly-10-mirror
magics-10
dragonfly-15
butterfly2-15
Add dropshadows where you like.
Close bk layer-Merge visible the rest
Activate the bk layer-new raster -selections all-
Copy and paste paper 6 into selection-keep selected
new raster-Copy and paste paper 3 into selection-
deselect.
Activate paper 3 layer-Blend mode Multiply-opacity-74.
merge visible.
Apply Xenofex2-Burnt Edges with these settings.


Resize- sharpen  Add ©- lic # and name

Save as JPEG
Would love to see your variations of this tut
Please mail tags to laurag315@gmail.com
please let me know which tut you did and put Laura
in the subject line and I will place your tag on my blog. 
Tube and Kit Preview

Friday, April 3, 2015

SPRING WHITE

****SPRING WHITE****
Ct  PTU  tut and PU FTU Facebook Cover for S&CO
PTU-Tube-"SPRING WHITE"©Andy Cooper-HERE
PTU-Kit-Spring White (Match to Andy Cooper)-Dnscraps -HERE
All available at Scraps and Company!
 
FTU Bonus FB Cover
Left click to get full size
Right click -save to your computer-upload-Enjoy!
 
 
Tutorial
  This tutorial was written by me and any similarities to any other is just a
coincidence. This tut was written in PSP 9 but should work in all versions.
 This tut assumes you have a moderate working knowledge of PSP.
What you will need
 Tube of choice.
Kit of choice.
Mask of choice
Font of choice
No outside filters used
 
    Let’s get started!
Open a 700 x 700 canvas.Flood fill with white-rename bk
 Copy and paste elements as follows, I have put the % of resize and any
special instructions.
circle-resize 85%
fence2-80
mushroomhouse-60
mushrooms-20
plants-45
little house-20
plants-45-mirror
walk-75
Copy and paste tube -resize 60%
tulips-20
truck-45
hat-20
tulips2-20-duplicate and mirror
 

Add dropshadows where you feel are needed.
Close off white bk -Merge visible the rest
above bk-new raster -selections all
copy and paste paper 8 into selection-deselect
apply mask(I used rebel designs mask 525) -Merge group-delete bk
Merge visible-resize-sharpen.
Add ©- lic # and name
Delete bk layer
Save as PNG.
 
Would love to see your variations of this tut
Please mail tags to laurag315@gmail.com
please let me know which tut you did and put Laura
in the subject line and I will place your tag on my blog.

Tube and Kit Preview


Wednesday, March 25, 2015

MARTINI SURF

 ****MARTINI SURF****
Ct  PTU  tut and PU FTU Facebook Cover for S&CO
PTU-Tube-"MARTINI SURF"©Andy Cooper-HERE
PTU-Kit-"Martini Surf" by Dnscraps-HERE
All available at Scraps and Company!
FTU Bonus FB Cover
Left click to get full size
Right click -save to your computer-upload-Enjoy!
 
 
Tutorial
  This tutorial was written by me and any similarities to any other is just a
coincidence. This tut was written in PSP 9 but should work in all versions.
 This tut assumes you have a moderate working knowledge of PSP.
What you will need
 Tube of choice.
Kit of choice.
Mask of choice
I used "Mask21"by BrutalDesigns-HERE
Font of choice.
No outside filters used


  Let’s get started!
Open a 700 x 700 canvas.Flood fill with white-rename bk
 Copy and paste elements as follows, I have put the % of resize and any
special instructions.
all the elements will have  Martinisurfdnkitpu before
the element name but i abbreviated to save time.
palm2-45-duplicate and mirror
sands-no resize
duplicate the sands and move down.
fishingnet-85
trunk-35
Copy and paste tube-resize 60%
bottle-25-mirror
shells2-25
starfish-15
shell-25
bird-25
Add dropshadows where you feel are needed.
Close off white bk -Merge visible the rest
above bk-new raster -selections all
copy and paste paper 4 into selection-deselect
apply mask -Merge group-delete bk
Merge visible-resize-sharpen.
Add ©- lic # and name
Delete bk layer
Save as PNG.
 
Would love to see your variations of this tut
Please mail tags to laurag315@gmail.com
please let me know which tut you did and put Laura
in the subject line and I will place your tag on my blog.

Tube and Kit Preview


Thursday, January 15, 2015

Red Angel Love


 **** Red Angel Love****

FTU-CT  FB Covers CT Tag
 CT for Scraps & Company
PTU Tube-"RED"©SnowBunny-HERE
PTU Kit-"Angel Love" by Dnscraps-HERE
All available at Scraps and Company!

For Facebook cover
Right click and save to your computer then upload to facebook.


Preview of Tube and Kit used

Tuesday, January 6, 2015

ANGELIC

****ANGELIC ****

FTU-CT  FB Covers and Snags
 CT for Scraps & Company
PTU Tube-"ANGELIC"©Andy Cooper-HERE
 PTU Kit-"Ash" by Dnscraps-HERE
 All available at Scraps and Company!
For Facebook cover
Right click and save to your computer then upload to facebook.
For Snags Right click and save to your computer.
and enjoy!


Snags


Tube and Kit Preview

Saturday, July 26, 2014

****HAPPY BLUE FAIRY ****

****HAPPY BLUE FAIRY ****

Ct  PTU tut for S&CO
Tube –"HAPPY BLUE FAIRY"-©The Hunter-HERE
Kit-"Happy Blue Fairy"-Dnscraps–HERE
All available at Scraps and Company!

This tutorial was written by me and any similarities to any other is just a
coincidence. This tut was written in PSP 9 but should work in all versions.
 This tut assumes you have a moderate working knowledge of PSP.
What you will need
 tube of choice.
kit of choice.
Font of choice.

Let’s get started!
Open a 800 x 800 canvas-Selections-selections all
Copy and paste paper 4 into selections-selections none.
Copy and paste elements as follows I have put the % of resize and any
special instructions. See tag for placement.
Copy and paste watter element-resize 85%-
Blend mode-Luminance-Opacity 46.
rainbow-no resize-blend mode-screen
opacity 72
stones-55
grass-60
magicbutterflys-75
magichouse-55-use eraser with these settings
and soften the bottom of the house.

magictree-55
wand-85-move to left side
boat-30
bridge-60-mirror
wand-85-mirror-move to right side.
Copy and paste tube-resize 60%
mill-10-right side of door
mushroom-15
magicpotion-15
mill10-mirror-right side of tag
mill-10-left side of door
lamp2-10
leaf-10
leaf-10-mirror
flowers-10
butterfly2-10
butterfly 3-10
add drop shadow where you like
I used 1-1-56-5.00-black
merge visible-resize-sharpen.
Add © lic # and name
for name I used “Magic:the Gathering”
paper 11 in the background box-foreground nil
selections-selections all selections modify-expand 1
new raster behind the name-floodfill with #1e7a7a
selections none-activate name layer and merge-down.
add drop shadow from above-blend mode-hard light.
save as JPEG.

Would love to see your variations of this tut
Please mail tags to laurag315@gmail.com
please let me know which tut you did and put Laura
in the subject line and I will place your tag on my blog.