Pages

Wednesday, August 27, 2014

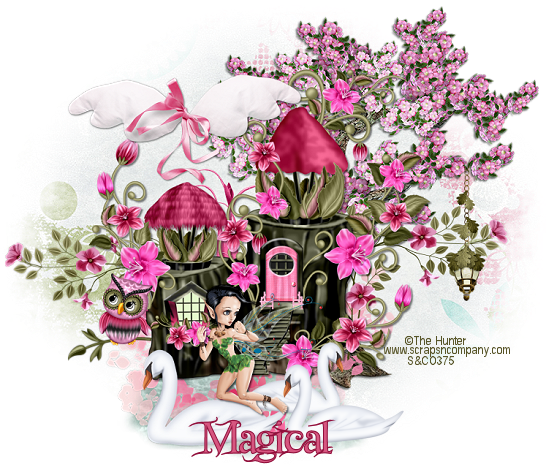
****MYSTICAL ****

****MYSTICAL ****

Ct  PTU tut for S&CO
Tube-"MYSTICAL"©Di_Halim-HERE
Kit-"MYSTICAL" by Bibis Collection–HERE
All available at Scraps and Company!

This tutorial was written by me and any similarities to any other is just a
coincidence. This tut was written in PSP 9 but should work in all versions.
 This tut assumes you have a moderate working knowledge of PSP.
What you will need
 Tube of choice.
Kit of choice.
Font of choice.
No Outside filters used.

Let’s get started!
Open a 800 x 800 canvas
Copy and paste elements as follows, I have put the % of resize and any
special instructions. See tag for placement.
New raster-selections all –copy and paste Paper9
Into selection-deselect.
158-55
49-no resize-erase to blend into bk
Erase around bench when placed.
Blend Mode-Darken.
Copy and paste tube-60%
45-20
79-20-rotate –free rotate-left 22.05
83-no resize
84-55
98-40
123-55
108-55
144-55-mirror
Add drop shadows where needed.
Resize-sharpen.
Add ©- lic # and name
Save as JPEG

Saturday, August 23, 2014

****Yellow Brick Road ****

****Yellow Brick Road ****

Ct  PTU tut for S&CO
Tube- "OZ 1" ©Andy Cooper-HERE
Kit"WIZARD OF OZ"-Bibi's Collection –HERE
All available at Scraps and Company!

This tutorial was written by me and any similarities to any other is just a
coincidence. This tut was written in PSP 9 but should work in all versions.
 This tut assumes you have a moderate working knowledge of PSP.
What you will need
 Tube of choice.
Kit of choice.
Font of choice.
Mask of choice.
No outside filters used

Let’s get started! 
Open a 800 x 800 canvas-Flood fill with white-rename bk.
Copy and paste elements as follows I have put the % of resize and any
special instructions. See tag for placement.
New raster-selections all –copy and paste Paper20
Into selection-deselect.
Apply mask-I used rebel designs 380
Merge group.
Element 102—no resize-blend mode Luminance
Opacity 66.
104-no resize-Blend mode –Luminance
91-40
7-15-duplicate and mirror
51-40
25-20
37-25
35-2—mirror
45-40
188-40
155-15-duplicate and mirror
172-25
173-25
155-35
Tube (Dorothy)-45
Tube (Scarecrow)-30
8-15
10-15
84-10
93-15
101-no resize
149-25
163-15
103-40
161-52
193-15
Add drop shadows where needed.
Resize-sharpen.
Delete bk layer merge visible.
Add ©- lic # and name
For font I used-“Oz'sWizard”-at 22
Stroke1
Bk color-#1d8836
Stroke-#005c07
Save as PNG
Would love to see your variations of this tut
Please mail tags to laurag315@gmail.com
please let me know which tut you did and put Laura
in the subject line and I will place your tag on my blog.

Jacqueline Collen-Tarolly CT Tags

Jacqueline Collen-Tarolly CT tags

Using the gorgeous PTU tube ©Jacqueline Collen-Tarolly
Tubes can be found at ADI
Tube can be purchased HERE
Kit used "adreamynight"-WD Designz


 Tube can be purchased HERE
Kit used "WD obsidianchaos" by WD Designz


Tube can be purchased HERE

Wednesday, August 20, 2014

****Lost In a Fairy Tale ****

****Lost In a Fairy Tale ****

Ct  PTU tut for S&CO
Tube-"LOST FAIRY TUBE"-© The Hunter-HERE
Kit "FAIRY TALE" by Bibis Collection–HERE
All available at Scraps and Company!

This tutorial was written by me and any similarities to any other is just a
coincidence. This tut was written in PSP 9 but should work in all versions.
 This tut assumes you have a moderate working knowledge of PSP.
What you will need
 Tube of choice.
Kit of choice.
Font of choice.
Mask of choice.
No outside filters used


Let’s get started!

Open a 800 x 800 canvas-Flood fill with white-rename bk.
Copy and paste elements as follows I have put the % of resize and any
special instructions. See tag for placement.
81-55
49-75
9-50
81-55-dulpicate and mirror
27-no resize
18-80
Copy and paste tube-resize 55%
55-80
57-80
63-no resize-blend mode-Luminance
24-30
98-35
104-35
100-15-mirror
100-15
72-35-mirror
80-35
53-35
72-35
80-35-mirror
42-30-duplicate and mirror
87-45
77-35
39-20-duplicate and mirror
1-50-duplicate and mirror
67-no resize
12-no resize
Add drop shadows where needed.
Resize-sharpen.
Delete bk layer merge visible.
Add ©- lic # and name
For font I used ”Simply*Glamorous”at 22.
Background color-#c7eee2
Selections select all-expand 1-new raster below name
Flood fill with #59a3ff-selections none-merge down-add
Drop shadow 1-0-50-3-black
Save as PNG


Would love to see your variations of this tut
Please mail tags to laurag315@gmail.com
please let me know which tut you did and put Laura
in the subject line and I will place your tag on my blog.

Monday, August 18, 2014

***Lis Fairy Snags***

CT for Totally Taggin
Lis Fairy Snags
kit can be found -HERE 
Snags can be found HERE also


****Fairy ****

****Fairy ****

Ct  PTU tut for S&CO
Tube-"FAIRY"© Vi Nina HERE
Kit "FAIRY"-Designs By Joan–HERE
All available at Scraps and Company!

This tutorial was written by me and any similarities to any other is just a
coincidence. This tut was written in PSP 9 but should work in all versions.
 This tut assumes you have a moderate working knowledge of PSP.
What you will need
 Tube of choice.
Kit of choice.
Font of choice.
Mask of choice.
No outside filters used

Let’s get started!
Open a 800 x 800 canvas-Flood fill with white-rename bk.
Copy and paste elements as follows I have put the % of resize and any
special instructions. See tag for placement.
17-60
55-40
40-60-erase edges with settings below

32-40
48-55
68-40
67-30
63-55-duplicate and mirror
71-15
75-20
Copy and paste tube –resize 38%-mirror
62-38
60-40
51-40
70-40
Add dropshadow as needed-close bk and merge visible rest
Resize-sharpen.
Now you should have 2 layers merged and bk
Activate bk layer-new raster –selections all
Copy and paste paper2  into selection.
Deselect.
Apply mask-I used rebel designs mask 411-merge group
Resize 90%
Delete bk layer merge visible.
Add ©- lic # and name
Font I used” MC Blossoms” at 26-stroke1
Bk color-#b0e5a1
Stroke-#5ba563
Save as PNG


Would love to see your variations of this tut
Please mail tags to laurag315@gmail.com
please let me know which tut you did and put Laura
in the subject line and I will place your tag on my blog.