Pages

Sunday, May 31, 2015

ENCHANTING

****ENCHANTING****
  PTU CT Tut for S&CO
PTU-Tube-"ENCHANTING"©Alfadesire-HERE
PTU-Kit-"MALEFICA"-Bibis Collection-HERE
All available at Scraps and Company!
 
Tutorial

  This tutorial was written by me and any similarities to any other is just a
coincidence. This tut was written in PSP 9 but should work in all versions.
 This tut assumes you have a moderate working knowledge of PSP.
What you will need
 Tube of choice.
Kit of choice.
Font of choice-I used"the Gingerbread House"
No outside filters used.


    Let’s get started!
Open a 800 x 800 canvas.Flood fill with white-rename bk
 Copy and paste elements as follows, I have put the % of resize and any
special instructions.
 
29-70
 
27-45-Blend Mode-Luminance(Legacy)
Duplicate this layer and Image flip.
 
26-40-Opacity 74
 
55-40-Image flip-Duplicate this layer and move up a bit.

Tube-resize 45%

38-20-mirror-Opacity-56-Blend mode-Luminance( Legacy)

34-70-opacity 60-Blend Mode-Darken

30-70
 
15-75-Duplicate and mirror-on the 1st layer erase the shoe out.
 
53-35-mirror
 
39-40
 
52-20
 
54-40
 
58-40
 
40-55
 
47-40-opacity 44

52-16
 
41-45
 
52-20
 
45-35

Add drop shadows as wanted
Close off white bk-Merge visible the rest.
Resize-Sharpen

Add ©- lic # and name

Save as PNG.
 
Would love to see your variations of this tut
Please mail tags to laurag315@gmail.com
please let me know which tut you did and put Laura
in the subject line and I will place your tag on my blog.
 
 
Tube and Kit Preview


Saturday, May 30, 2015

Look at Us

****Look at Us****
 CT FOR BLT DEZIGNZ 
 Amazing kit with 73 elements and 20 papers
PU FTU Clusters and QP by me
Kit can be purchase -HERE 
Digiscrapbooking Boutique
Also at PFD in tagger size- HERE

Cluster by me Full size and printable 1200 x 1200
 
 QP by me Full size 3600 x 3600 printable


BLUE MERMAID

****BLUE MERMAID****
  PTU CT Tut for S&CO
PTU-Tube-" BLUE MERMAID "©SNCO Exclu(Angelica S. Dolls)-HERE
PTU-Kit-"COCONUT"-Bibis Collection -HERE
All available at Scraps and Company!
 
Tutorial

  This tutorial was written by me and any similarities to any other is just a
coincidence. This tut was written in PSP 9 but should work in all versions.
 This tut assumes you have a moderate working knowledge of PSP.
What you will need
 Tube of choice.
Kit of choice.
Font of choice-I used"A&S Snapper Script"
Mask of Choice-I used"RR_MaskSet43_Mask1"-HERE
No outside filters used.


    Let’s get started!
Open a 800 x 800 canvas.Flood fill with white-rename bk
 Copy and paste elements as follows, I have put the % of resize and any
special instructions
 
42-no resize-duplicate and mirror.
 
24-no resize-duplicate and mirror.
 
37-no resize-duplicate and mirror
 
11-80-duplicate and mirror
 
35-80
 
9-50
 
4-no resize-duplicate and mirror
 
22-30-duplicate and mirror
 
50-30
 
62-80
 
19-80
 
Copy and paste tube-resize 50% 
 
60-30
 
43-no resize
 
47-80-mirror
 
Add Drop shadows as needed
 
Close bk layer -merge visible
 
Resize- sharpen
 
New raster above bk selections all-
copy and paste paper1 into selection -deselect
 
Apply mask to paper layer-merge group.
 
Activate the merged layer-Copy and paste 
element 69-resize 75%.
 
Delete white bk
 
Merge visible 
 
Add ©- lic # and name

Save as PNG.
 
Would love to see your variations of this tut
Please mail tags to laurag315@gmail.com
please let me know which tut you did and put Laura
in the subject line and I will place your tag on my blog.
 
 
Tube and Kit Preview


.
 

Thursday, May 28, 2015

"BLUE FAIRY"

****BLUE FAIRY****
  PTU CT Tut for S&CO
PTU-Tube-"BLUE FAIRY"© Danny Lee -HERE
PTU-Kit-"Blue Fairy"-FwTags Creations-HERE
All available at Scraps and Company!
 
Tutorial

  This tutorial was written by me and any similarities to any other is just a
coincidence. This tut was written in PSP 9 but should work in all versions.
 This tut assumes you have a moderate working knowledge of PSP.
What you will need
 Tube of choice.
Kit of choice.
Font of choice-I used"Mad Beef"
Mask of Choice-I used"RR_MaskSet48_Mask4"-HERE
No outside filters used.


    Let’s get started!
Open a 800 x 800 canvas.Flood fill with white-rename bk
 Copy and paste elements as follows, I have put the % of resize and any
special instructions.
 42-75
15-55
8-55
18-70-mirror
23-70
68-65-blend erase  to put under leaves
64-25
Copy and paste tube-resize 65%-erase bottom of dress.
13-80
40-25
62-15
12-55
22-60
Add Drop shadows as needed
Close bk layer -merge visible
Resize- sharpen
New raster above bk selections all-
copy and paste paper1 into selection-
deselect.--Apply mask-Merge group-Mirror.
 
New raster above bk selections all-
copy and paste paper6-resize 90% into selection-Opacity 54%
deselect.-Apply mask-Merge group
 
 
Delete bk layer -merge visible .
Add ©- lic # and name
Save as PNG.
Would love to see your variations of this tut
Please mail tags to laurag315@gmail.com
please let me know which tut you did and put Laura
in the subject line and I will place your tag on my blog.
 
 
Tube and Kit Preview


Monday, May 25, 2015

FAIRY JOJO

****FAIRY JOJO****
  PTU CT Tut for S&CO
PTU-Tube-"FAIRY JOJO" ©Ishika Chowdhury-HERE
PTU-Kit-"Fairy Jojo -Mushroom"- Dnscraps-HERE
All available at Scraps and Company!
Tutorial

  This tutorial was written by me and any similarities to any other is just a
coincidence. This tut was written in PSP 9 but should work in all versions.
 This tut assumes you have a moderate working knowledge of PSP.
What you will need
 Tube of choice.
Kit of choice.
Font of choice-I used"Fontdinerdotcom Sparkly"
Mask of Choice-I used"DD_NGM1_2015_1"-HERE
No outside filters used


    Let’s get started!
Open a 800 x 800 canvas.Flood fill with white-rename bk
 Copy and paste elements as follows, I have put the % of resize and any
special instructions.
 
 Lawn-60-duplicate and mirror
house-60
road-60
plantss-60
flowerss3-25
Tube-20
mushroom-15
mushrooms-35
plantss-35
tree-80
mushroom-12
trunk-65
magicleaves-20
bird-10
flowers2-25
flowerss4-15
butterfly-15

Add Drop shadows as needed
Close bk layer -merge visible
Resize- sharpen
New raster above bk selctions all-
copy and paste paper7 into selection-
deselect.-Apply mask-Merge group
Delete bk layer -merge visible .
Add ©- lic # and name
Save as PNG.
Would love to see your variations of this tut
Please mail tags to laurag315@gmail.com
please let me know which tut you did and put Laura
in the subject line and I will place your tag on my blog.
 
 
Tube and Kit Preview


Sunday, May 24, 2015

HOT ORANGE SUMMER COLLAB

****HOT ORANGE SUMMER COLLAB****

Memorial Day Sale Weekend!!!
Tons of new products and Gorgeous Collab and freebies with purchase!!

GORGEOUS  HOT ORANGE SUMMER STORE COLLAB
WITH GORGEOUS TUBE BY DI HALIM
WITH TONS AND TONS OF  BEATIFUL ITEMS
KITS, TUBES, CU, ALPHA AND MORE!!!
And FTU Facebook covers from me!

Full size covers below
FTU Bonus FB Cover
Left click to get full size
Right click -save to your computer-upload-Enjoy!
 
All kits from the collab-HERE
Tube-" BIKINI ORANGE"©AndyCooper-HERE
Add this product to your cart and spend just $4.00 to get it as a free gift.
 
Tube" SUMMER"©LadyMishka Dolls
  Add this product to your cart and spend just $2.00 to get it as a free gift.


Tube-" BIKINI ORANGE"©AndyCooper-HERE
Add this product to your cart and spend just $4.00 to get it as a free gift.
 
Tube" SUMMER"©PandoraCreations-HERE
Add this product to your cart and spend just $4.00 to get it as a free gift.

Tube" MERMAID-© SNCO Exclu (AngelicaS)-HERE
 Add this product to your cart and spend just $5.00 to get it as a free gift.

Tube" HOT ORANGE SUMMER"© SNCO Exclu (DiHalim)-HERE
Add this product to your cart and spend just $5.00 to get it as a free gift.

Saturday, May 23, 2015

MERMAID-LM

**** MERMAID-LM ****

  PTU CT tut and PU FTU Facebook Cover for S&CO
PTU-Tube -"MERMAID"©LadyMishka -HERE
PTU-Kit-"MAGIC MERMAID"- Bibis Collection-HERE
All available at Scraps and Company!


FTU Bonus FB Cover
Left click to get full size
Right click -save to your computer-upload-Enjoy!
 
 
Tutorial
  This tutorial was written by me and any similarities to any other is just a
coincidence. This tut was written in PSP 9 but should work in all versions.
 This tut assumes you have a moderate working knowledge of PSP.
What you will need
 Tube of choice.
Kit of choice.
Font of choice
No outside filters used

    Let’s get started!
Open a 851 x 351 canvas.Selections all -copy and paste paper 7 
into selection.-deselect.

 Copy and paste elements as follows, I have put the % of resize and any
special instructions.
 
28-80
 
Copy and paste  60-50-duplicate and mirror-duplicate
again, image flip -Place as center frame-arrange and merge all
3 frames.
 
Activate layer below frames
Magic wand inside of each frame-expand 2
New raster behind frames-
Copy and paste paper5 into selection-deselect
 
69-30-Blend mode Luminance legacy
 
73-25 
 
activate frame layer apply elements in order

29-80

39-40-duplicate and mirror

29-80-mirror

Copy and paste tube-resize 20%
 
83-35
 
84-35-mirror
 
tube-resize 40%
 
tube-resize 20%-mirror
 
37-40
 
95-50 Duplicate and mirror
 
87-20
 
89-20 -d duplicate and mirror
 
81-35
 
68-40
 
35-20-mirror
 
17-30
 
88-13
 
11-30
 
98-45 duplicate and mirror
 
32-45-mirror -erase under hand
 
10-25
 
12-65
 
10-25-mirror
 
 
 add drop shadows and arrange elements to your liking.

 Merge visible 
 
Apply a frame of 5 in a blue color of liking-add drop shadow
  Add ©- lic # and name.
 
Save as Jpeg-Upload to Facebook

Would love to see your variations of this tut
Please mail tags to laurag315@gmail.com
please let me know which tut you did and put Laura
in the subject line and I will place your tag on my blog
.
Tube and Kit Preview


Friday, May 22, 2015

SAREE GREEN

****SAREE GREEN****
  PTU CT Tut for S&CO
PTU-Tube-"SAREE GREEN"©Andy Cooper -HERE
PTU-Kit-"Saree's Paradise"-Disturbed Scraps-HERE
All available at Scraps and Company!


Tutorial

  This tutorial was written by me and any similarities to any other is just a
coincidence. This tut was written in PSP 9 but should work in all versions.
 This tut assumes you have a moderate working knowledge of PSP.
What you will need
 Tube of choice.
Kit of choice.
Font of choice-I used"XXII ARABIAN-ONENIGHTSTAND"
Mask of Choice-I used"Rebel Designs 525"-HERE
No outside filters used


    Let’s get started!
Open a 800 x 800 canvas.Flood fill with white-rename bk
 Copy and paste elements as follows, I have put the % of resize and any
special instructions.
 79-55-duplicate and mirror-duplicate the duplicated 
layer -place after the frame gets pasted
 
paper 6-resize 50-erase to fit behind the frame once placed.
 
27-no resize
 
81-50
 
70-50
 
13-34
 
Tube-resize 55%
 
26-40
 
39-60
 
24-30-Duplicate and mirror
 
28-50
 
30-50
 
49-30
 
21-25
 
19-30
 
23-30
 
50-55
 
12-30
 
16-20
 
14-35
 
8-25-mirror


Add Drop shadows as needed.
Close bk layer -merge visible
Resize- sharpen
New raster above bk selections all-
copy and paste paper 7 into selection-
deselect.-Apply mask-Merge group
Delete bk layer -merge visible .
Add ©- lic # and name
Save as PNG.
Would love to see your variations of this tut
Please mail tags to laurag315@gmail.com
please let me know which tut you did and put Laura
in the subject line and I will place your tag on my blog.


Thursday, May 21, 2015

FAIRY IN THE WOODS

****FAIRY IN THE WOODS****
  PTU CT Tut for S&CO
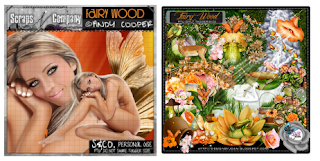
PTU-Tube-"FAIRY WOOD"© Andy Cooper-HERE
PTU-Kit-"FAIRY WOOD"-Designs By Joan-HERE
All available at Scraps and Company!
 
 
Tutorial

  This tutorial was written by me and any similarities to any other is just a
coincidence. This tut was written in PSP 9 but should work in all versions.
 This tut assumes you have a moderate working knowledge of PSP.
What you will need
 Tube of choice.
Kit of choice.
Font of choice-I used"Brayden Script"
Mask of Choice-I used" KKMASK1"-HERE
No outside filters used


    Let’s get started!
Open a 800 x 800 canvas.Flood fill with white-rename bk
 Copy and paste elements as follows, I have put the % of resize and any
special instructions.
 16-no resize
35-no resize
30-35
8-25-mirror
129-55-mirror
Co[py and paste tube-resize 55- Blend erase into flower.
66-75
31-35
79-55
70-35
56-35
36-35
12-45
1-40
82-40
6-40-mirror
Add Drop shadows as needed
Close bk layer -merge visible
Resize- sharpen
New raster above bk selctions all-
copy and paste paper1 into selection-
deselect.-Apply mask-Merge group
Delete bk layer -merge visible .
Add ©- lic # and name
Save as PNG.


Would love to see your variations of this tut
Please mail tags to laurag315@gmail.com
please let me know which tut you did and put Laura
in the subject line and I will place your tag on my blog.
 
 
Tube and Kit Preview


Tuesday, May 19, 2015

BLUE UNICORN DREAMS

****BLUE UNICORN DREAMS****
  PTU CT Tut for S&CO
PTU-Tube-"BLUE UNICORN"©Exclu-LM-HERE
PTU-Kit-"Unicorn Dreams"-Dnscraps-HERE
All available at Scraps and Company!
 
 
Tutorial

  This tutorial was written by me and any similarities to any other is just a
coincidence. This tut was written in PSP 9 but should work in all versions.
 This tut assumes you have a moderate working knowledge of PSP.
What you will need
 Tube of choice.
Kit of choice.
Font of choice-I used"Brayden Script"
No outside filters used


    Let’s get started!
Open a 800 x 800 canvas.Flood fill with white-rename bk
 Copy and paste elements as follows, I have put the % of resize and any
special instructions.
 
paper6-no resize
 
paper-no resize-opacity-78-blend mode-difference
 
castle-35%-blend mode-overlay
 
hallostars 2-no resize
 
dragonflys-50
 
dragonfly-30
 
tube-65
 
butterfly2-30
 
fairyhouse-30
 
magicwand 2-30-
erase a bit to fit between the hooves
 
midge 2 -35
 
add drop shadows
 
Merge visible
 
duplicate 2 times-delete original
 
on the bottom layer-resize 650x650
 
selections all-selctions-float-defloat
 
apply gaussian blur
 
 
on the top layer resize 600x 600
 
add dropshadow  2-2-50-5-black
 
Merge visible-Image canvas size
 
650x650- sharpen- Add ©- lic # and name
Save as JPEG
 
Would love to see your variations of this tut
Please mail tags to laurag315@gmail.com
please let me know which tut you did and put Laura
in the subject line and I will place your tag on my blog.
 
 
Tube and Kit Preview


AMY STEAMPUNK

****AMY STEAMPUNK****
  PTU CT Tut for S&CO
PTU-"AMY STEAMPUNK"© Celinart Pinup -HERE
PTU-Kit-"AMY STEAMPUNK"-Bibis Collection-HERE
All available at Scraps and Company!
 
Tutorial

  This tutorial was written by me and any similarities to any other is just a
coincidence. This tut was written in PSP 9 but should work in all versions.
 This tut assumes you have a moderate working knowledge of PSP.
What you will need
 Tube of choice.
Kit of choice.
Mask of choice-I used"RR_MaskSet23_1"-HERE
Font of choice-I used"Steampunk_Font_by_hannarb"-HERE
No outside filters used


    Let’s get started!
Open a 800 x 800 canvas.Flood fill with white-rename bk
 Copy and paste elements as follows, I have put the % of resize and any
special instructions.
63-no resize
Copy and paste tube-resize 75%- mirror-erase into the scroll
102-25
69-65
94-45
48-25
85-49
66-45
add drop shadows 
close bk layer -merge visible
 
new raster above bk layer-selections all 
paste paper 3 into selection-deselect.
Apply Mask-merge group.
 
new raster copy and paste element 19 into selection-deselect
Apply Mask-merge group-Blend mode-Lighten
 
Delete bk layer-merge visible

Resize- sharpen  Add ©- lic # and name
Save as PNG.
 
Would love to see your variations of this tut
Please mail tags to laurag315@gmail.com
please let me know which tut you did and put Laura
in the subject line and I will place your tag on my blog.
 
 
Tube and Kit Preview
 

Monday, May 18, 2015

Grace

****Grace****
  PTU CT Tut for S&CO
PTU-"Grace" ©Carpe Diem-HERE
PTU-Kit-"Dark Fairy"- Dnscraps-HERE
All available at Scraps and Company!
Tutorial

  This tutorial was written by me and any similarities to any other is just a
coincidence. This tut was written in PSP 9 but should work in all versions.
 This tut assumes you have a moderate working knowledge of PSP.
What you will need
 Tube of choice.
Kit of choice.
Wordart of choice-I used one from -HERE
Font of choice-I used"Scriptina"
No outside filters used


    Let’s get started!
Open a 800 x 800 canvas.Flood fill with white-rename bk
 Copy and paste elements as follows, I have put the % of resize and any
special instructions.
 
fucsia-no resize-duplicate and mirror
wings2-45-duplicate and mirror
magicdoor-no resize-ersae a bit of the bottom
mushroom-50-duplicate and mirror
tube-25-mirror-opacity 60%-Blend mode-Hard Light
Black Tree-65-blend erase a little over the door
Magicslide-50
butterflys-no resize
Copy and paste tube-45%

Add dropshadows where you like.
Close off bk layer -merge visible the rest.
 Open bk layer
starss3-no resize
starspurple-no resize-duplicate and mirror
Add wordart if you like
Delete bk layer
Merge visible the rest.

Resize- sharpen  Add ©- lic # and name
Save as PNG.
 
Would love to see your variations of this tut
Please mail tags to laurag315@gmail.com
please let me know which tut you did and put Laura
in the subject line and I will place your tag on my blog.
 
 
Tube and Kit Preview


Thursday, May 14, 2015

GOTH NURSE

****GOTH NURSE****
  PTU CT Tut for S&CO
PTU-"GOTH NURSE"© Alfadesire-HERE
PTU-Kit-"DARK NURSE"-Bibi's Collection-HERE
All available at Scraps and Company!
 
Tutorial

  This tutorial was written by me and any similarities to any other is just a
coincidence. This tut was written in PSP 9 but should work in all versions.
 This tut assumes you have a moderate working knowledge of PSP.
What you will need
 Tube of choice.
Kit of choice.
Mask-I used "RR_MaskSet44_Mask3"-HERE
Font of choice-I used"Northwood High"
No outside filters used


    Let’s get started!
Open a 700 x 700 canvas.Flood fill with white-rename bk
 Copy and paste elements as follows, I have put the % of resize and any
special instructions.
21-85-duplicate and mirror
29-50
48-40-mirror
67-35-Erase to fit in mirror -Opacity-60-
Blend Mode-Luminance Legacy.

36-40
48-40
67-35-Mirror-Erase to fit in mirror -Opacity-60-
Blend Mode-Luminance Legacy.
61-50
51-30
31-50
Copy and Paste Blue tube-resize 40%
Copy and paste Green tube-resize 40%-mirror.
60-35
59-20-mirror
52-40
22-25
18-26-duplicate 2x and mirror last one.
58-24
60-35

Add dropshadows where you like.
Close off bk layer -merge visible the rest
New raster above the bk layer
 Copy and paste Paper10  into selection-deselect
Apply mask
merge group.Duplicate this layer,Image Flip.
Move one up to the top left and the other
to the bottom right.

 
Delete the bk layer
Merge visible.
 Resize- sharpen  Add ©- lic # and name
Save as PNG.
 
Would love to see your variations of this tut
Please mail tags to laurag315@gmail.com
please let me know which tut you did and put Laura
in the subject line and I will place your tag on my blog.
 
 
Tube and Kit Preview